Pasta

really good bolognese

March 21, 2012

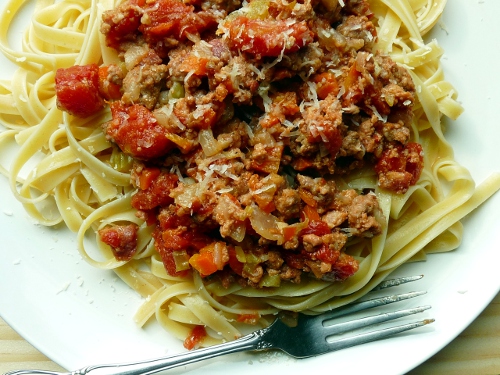
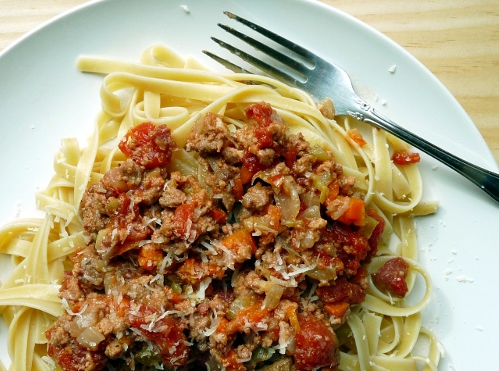
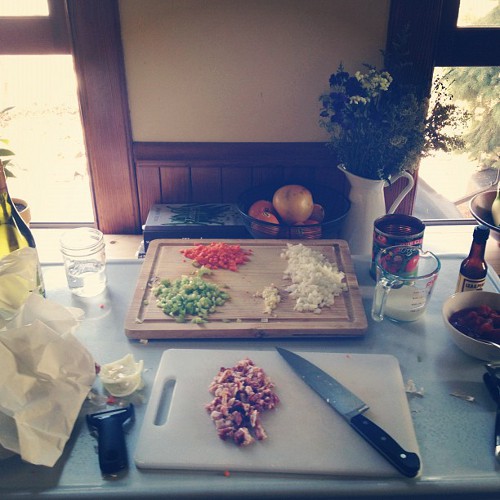
I’m going out on a limb to claim that what you see before you is not just really good, but in fact, the best homemade bolognese I’ve ever had. I have back-up in the form of a husband who told me in no uncertain words, “you need to make it clear how amazing this is”.

Spaghetti Bolognese was one of the first meals I learned to cook for myself. It was one of those recipes that my Mum packed me off to university with, knowing that despite being a poor student I’d probably always be able to afford some tinned tomatoes, minced* beef, and spaghetti.

Spag bol, as it’s affectionately known at home, is a standard in most people’s repertoire. It’s an easy, no fuss meal and it fills you up like nobody’s business. This one is not in any way difficult but it is a bit special.

In researching the most authentic and delicious recipes I came across another one of those great Felicity Cloake articles in the Guardian, this time: How to make perfect bolognese which covered all the pressing questions of our time like “red or white wine?”, “pancetta or bacon?”, and “chicken liver, really?!”. (No matter how many times I read that chicken liver is essential, I just don’t want it in my spag bol, thank you very much.)

The secret weapons in this bolognese? The combination of beef and pork mince is fantastic and the addition of thick-cut smoky bacon makes it a sweet-salty dream. Dry white wine adds a fresh, bright tang which is mellowed considerably by the addition of creamy milk. You can’t taste the milk in the end product (it’s simmered off before the wine is even added) but I think it’s inclusion is essential for that balance. Finally, freshly grated nutmeg brings a warm spice and all you need to finish the dish off is a grating of Parmesan.

Let me be clear: this is not a weeknight meal. It needs 3 or 4 hours in the oven for the meat to become wonderfully tender: an entirely different beast than the spag bol days of yore when I whisked up a spag bol on the stove top in 30 minutes. But it doesn’t require much attention and it’s so, so worth it. And that’s always the kicker isn’t it? Is it worth it? Unequivocally YES.

Pick a Saturday or Sunday afternoon when you have things to do around the house and let this simmer in the background whilst you enjoy a glass of wine and whatever else you have going on. Serve it for a luxurious supper and enjoy the tender, flavourful plate of goodness that comes from taking the time to make really good bolognese.

Really Good Bolognese

Ingredients

  • 1 tbsp of butter
  • 70g/ 2.5oz thick smoked bacon, finely diced, or cubed pancetta
  • 1 onion, finely diced
  • 2 cloves garlic, minced
  • 1 carrot, finely diced
  • 2 sticks celery, finely diced
  • 200g/ 7oz coarsely minced beef, at room temperature
  • 100g/ 3.5oz minced pork, at room temperature
  • Dash Worcestershire sauce
  • 150ml/ 5floz milk
  • Whole nutmeg, to grate
  • 150ml/ 5floz dry white wine
  • 400ml/ 14oz tin chopped tomatoes
  • Parmesan cheese, to serve

Directions

  1. Melt the butter in a large skillet or dutch oven over a gentle heat and then add the bacon. Once the bacon fat has started to melt, add the onion, and cook gently until softened. Add the garlic and cook for a minute. Add the carrot, and cook for 5 minutes before adding the celery and cooking for a further couple of minutes.
  2. Add the beef and pork to the pan and brown, stirring occasionally to break up any lumps. Season with salt and pepper, and let it cook for another 5 minutes.
  3. Pre-heat the oven to 125C/ 250F. Pour in the milk, and grate a little fresh nutmeg over the top. Simmer gently until almost all the milk has evaporated, which should take about half an hour.
  4. Pour in the wine, tomatoes, and a dash of Worcestershire sauce, and stir well. Put the casserole into the oven, with the lid slightly askew, and cook for at least 3 hours (4 is even better) until the meat is very tender. Check on it occasionally, and top up with a little water if it seems too dry, although this probably won’t be necessary. Serve with pasta and grated Parmesan cheese.

*Minced meat is what we Brits call ground meat. It’s essentially the exact same thing, although I’ve noticed that in the States it tends to look like one big lump, sort of like sausage meat, whereas at home it appears like tiny little slivers of meat. Check out this photo to see what I mean. Okay, sorry for making you look at photos of raw meat…
beet and chèvre ravioli

September 30, 2011

I wanted to post this recipe for two reasons.

1) Um…. yum.

2) To show you that you don’t need spendy equipment or tons of kitchen experience to make fancy pants ravioli from scratch.

Maybe you don’t realise this reading my blog but I don’t own a kitchen aid stand mixer. Or any kind of mixer for that matter. When I bake cakes and cookies and whatnot, I do it using my hands, a wooden spoon and maybe a fork. Yeah. It’s a workout.

I tell you this because it’s easy to read food blogs and think “oh but I couldn’t do that…”. Trust me, you can. If I can do it with my trusty wooden rolling pin and no fancy equipment, so can you.

Although I will say this: if you so happen to already have a pasta crank, please save yourself some sweat and use the damn thing. I built some serious muscle rolling out this pasta and it mine wasn’t quite thin enough. I’m not a martyr…it’s just the way it is. I truly believe you don’t need all that jazzy electrical stuff, but it sure must make things easier.

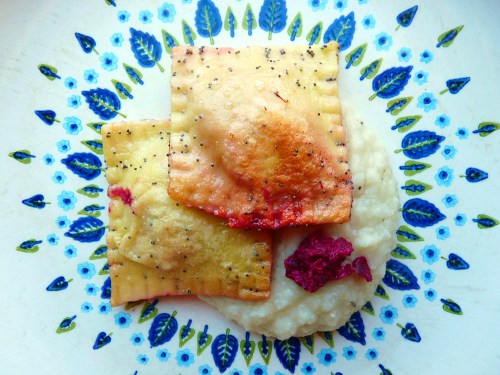
So are you ready for rich, creamy, bright goat cheese and beets and fresh-as-it-gets pasta pan-fried and sprinkled with poppy seeds for an addictive crunch? Yeah you are.

Beet and Chèvre Ravioli
adapted from this recipe

Ingredients

  • 2 medium-sized red beets
  • 2 oz. chèvre (goat cheese)
  • 1 batch of egg pasta dough (recipe below)
  • 1/2 tbsp poppy seeds
  • 2 tbsp butter

Directions

  1. Preheat oven to 400F. Pierce beets a few times. Place in a baking dish and cover with foil. Roast beets until tender, about 1 hour. Remove from oven and let beets sit until they are cool enough to handle. Peel off skin. Grate beets into a bowl or chop with a food processor. Mix in goat cheese.
  2. Divide pasta dough in half (you should have 2 portions altogether). Roll 1 portion into even-shaped rectangles (or run through a pasta crank) until about 1/16 in. thick. Place spoonfuls of filling about an inch apart along one portion of dough. When there is no more room on the dough, dab a little bit of water onto areas between filling (or mist with a spray bottle). Place other portion of dough on top and press to seal. Try to work from the inside out, to avoid air pockets in the ravioli. Cut with a pastry wheel.
  3. Bring a pot of water to a boil. Add in pasta. Begin heating butter in a pan over medium-high heat. When ravioli have finished cooking (they’re ready once they begin to float), use a slotted spoon to transfer them from the pot to the frying pan. Sprinkle on some poppy seeds and fry until golden on each side. Transfer to a plate. Add some more poppy seeds and freshly grated parmesan cheese before serving.

Egg Pasta Dough

Ingredients

  • 2 cups of all-purpose flour
  • 3 large eggs
  • olive oil if/as needed

Directions

  1. Sift the flour into a large bowl and make a well in the center. Crack your eggs into the well and using a fork, beat the eggs and begin to pull flour into the liquid.
  2. Once you can no longer mix with a fork, knead dough on a well-floured surface until smooth and elastic (should take 8–10 minutes and your arms will be…sore). If the dough feels a bit dry, add a little olive oil when kneading.
  3. Cover dough with a wet tea towel and let rest for 10 minutes.

This recipe will make approximately 2 dozen ravioli. We served ours with white bean puree and were stuffed to the gills.

Statesiders, are you sick of Thanksgiving leftovers yet? I think I’m just about done with eating cold turkey. Although I have to say that the turkey/stuffing/mashed potato omelette (don’t knock it til you try it) that my awesome husband brought me in bed the other morning was pretty stellar.

Even so, time for a change and here it is. This dish is a welcome relief from all things holiday-related. It’s a great Autumn/Winter salad: warm and hearty, yet fresh and tangy. Love.

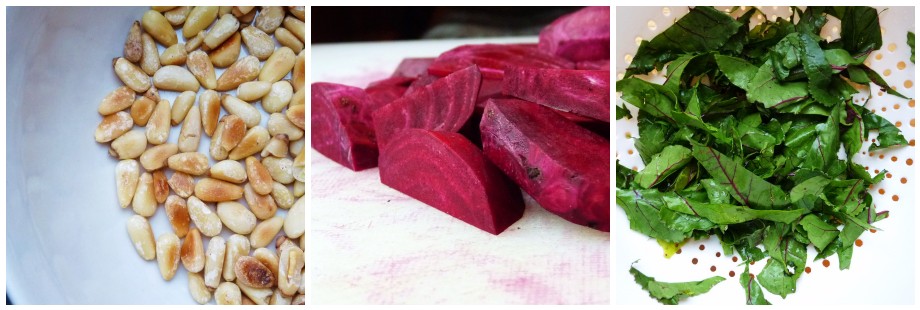
I love roasting beets but I’ve never boiled them before. I’ve also never used the beet greens before. Turns out, sauteed with red onion and garlic, they are nigh on perfect.

Add in some al dente orzo, crunchy, toasted pine nuts, and creamy, tangy feta and you have yourself a whole lotta loving in a bowl. Don’t you love how the orzo is all orangey-red from cooking in the beet water? I do. But then, those are the kinds of things that excite me. And yes, I need to get out more.

Warm Orzo Salad with Beets and Greens

from The Parsley Thief

Ingredients

  • 3/4 lb beets with greens
  • 1/4 cup pine nuts
  • 2 tbsp extra virgin olive oil
  • 1/2 medium red onion, thinly sliced
  • 2 cloves garlic, minced
  • 8 ounces orzo pasta
  • 3 ounces feta cheese, crumbled
  • salt and freshly ground pepper

Directions

  1. Heat the pine nuts in a dry skillet, over medium heat, until they begin to brown. Watch them carefully, as they will burn in a flash. Remove from the heat and transfer to a bowl. Set aside.
  2. Peel the beets and slice them into bite-sized pieces. Remove the stems from the beet greens and slice the leaves into strips. Wash the greens thoroughly to remove any grit.
  3. Heat the olive oil in a skillet over medium heat. Add the sliced red onion and garlic. Cook until the onions are tender and golden brown, about 10 minutes. Reduce the heat to medium low and add the beet greens. Cover and cook, tossing occasionally, until the greens are wilted, about 5 minutes.
  4. Meanwhile, cook the beets in a pot of salted water, until just tender, about 10-12 minutes. Remove the beets from the pot using a slotted spoon and set aside. Return the water to a boil and add the pasta. Cook, according to the package instructions, until al dente and drain.
  5. Add the orzo to a bowl, along with the beets, pine nuts, beet greens and crumbled feta. Toss, season with salt and pepper to taste and serve.

Serves 6, as a side dish